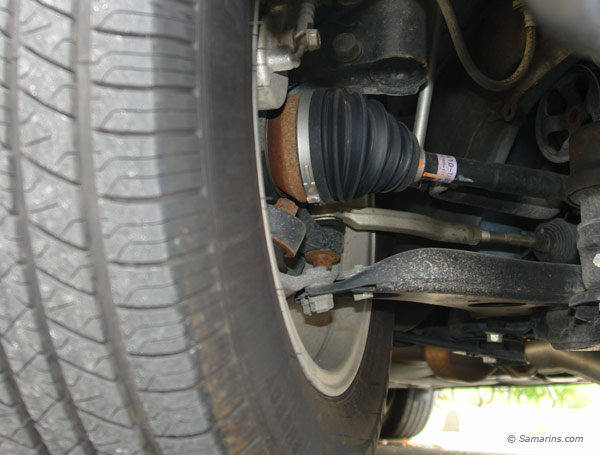
CV joints are an essential component of your car’s drivetrain system. These Constant Velocity joints connect the transverse control arms to the wheels and allow the wheels to move up and down while cornering. CV joints are encased in rubber boots that hold grease in the joint and keep contaminants out. In this article, we will dive deep into Cv joint Symptoms.
Over time, the CV joint boots can crack or tear from wear and age. This causes the lubricating grease to leak out. Without the grease, the steel joint surfaces grind together causing wear. This results in looseness and play in the CV joints.
Loose or worn CV joints manifest in a variety of symptoms that indicate it’s time to have your car’s axle inspected and repaired. Addressing minor CV joint issues promptly can prevent more serious mechanical damage down the road.
In this article, we will cover the most common signs of failing CV joints. Learning to spot and diagnose these symptoms can help you get necessary CV joint repairs performed before major problems develop. We’ll also discuss average CV joint replacement costs and procedures. Read on to protect your car’s axle joints.
CV Joint Anatomy and Function
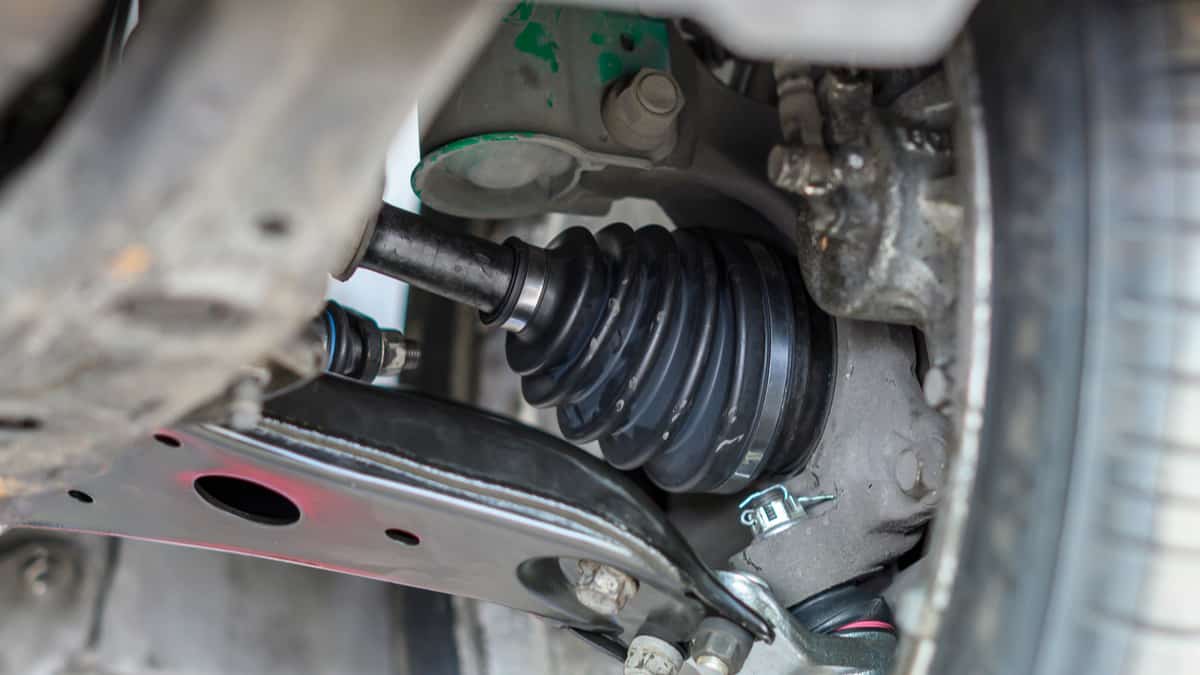
CV joints, or Constant Velocity joints, are a coupling found on either end of the drive axles and axle shafts in your car. Their purpose is to smoothly transmit rotational power from the transmission to the wheels at a constant speed while accommodating the up and down wheel movement from suspension travel.
Cars use either a Rzeppa or ball-type joint. Joints typically come in tripod or double-offset designs. The joints are lubricated internally with grease and protected by a rubber boot sealed with metal clamps on the end.
There are inner and outer CV joints in each axle shaft assembly:
Inner CV Joint
The inner CV joint connects the outer end of the transmission to the inner end of the axle shaft. On the transmission side, it has a plunging in-and-out motion that allows for changes in suspension travel. On the axle shaft side, it uses splines that fix it solidly to the shaft.
Outer CV Joint
The outer CV joint connects the outer end of the axle shaft to the wheel hub or steering knuckle. This joint allows the wheel to move when steering while transmitting rotational force from the axle shaft to turn the wheels.
Both inner and outer CV joints are essential in delivering power to the front wheels while providing a comfortable, controlled ride. The CV joints must be kept lubricated and free of contaminants to prevent accelerated wear.
Causes of CV Joint Failure
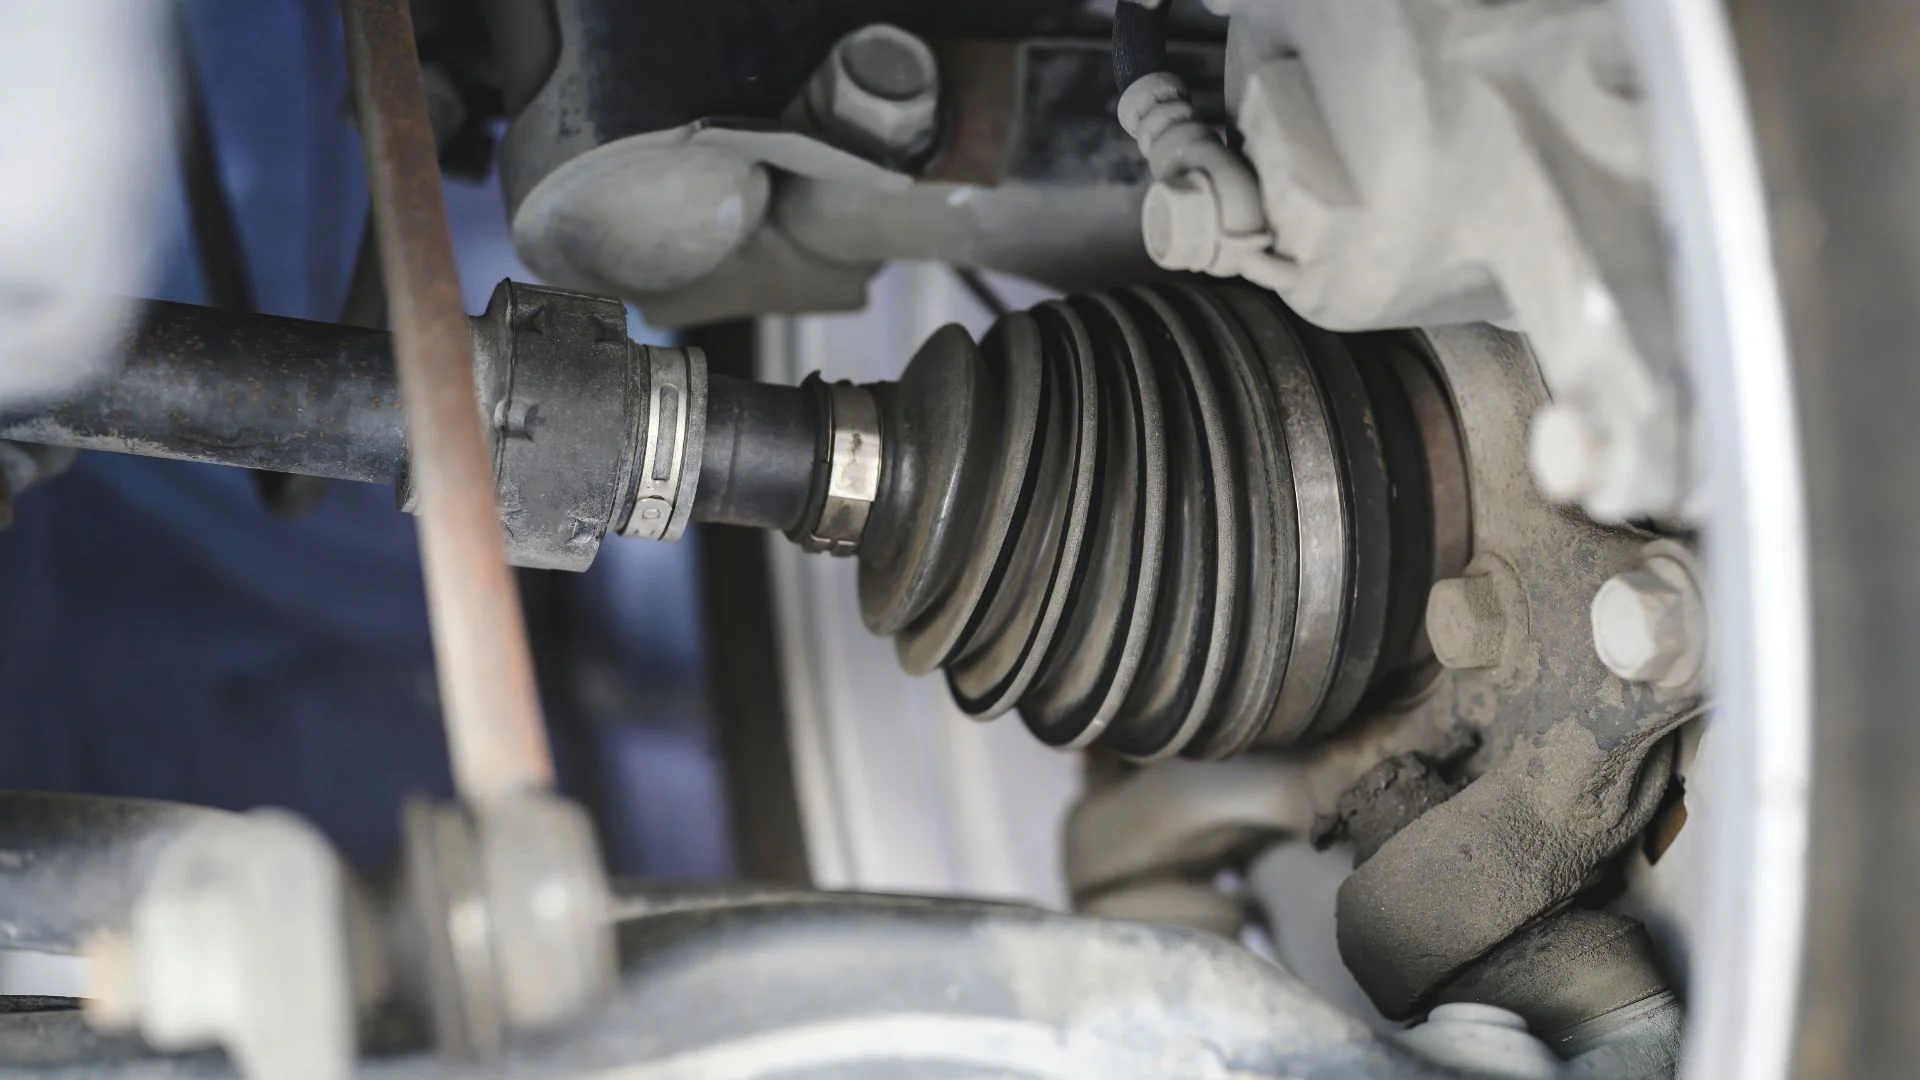
There are several reasons CV joints eventually wear out and fail with age and mileage:
- The constant angular motion places stress on the joint components causing microscopic surface fatigue and cracking.
- The rubber boot that keeps grease in and dirt out eventually cracks or leaks, allowing contaminants to enter the joint and grease to leak out.
- Exposure to weather and elements like water, dirt, and road salt accelerates the deterioration of the rubber boots.
- Trauma to the suspension from hitting severe potholes or bottoming out can damage the CV joints or tear their protective boots.
Regular inspection of CV joint boots and periodic replacement of the grease can prolong the life of your CV joints. But inevitably the joints will wear out over time, with failures typically occurring once a vehicle surpasses 100,000 miles or 10 years.
Clicking Noise When Turning
One of the first and most common symptoms of worn CV joints is a clicking noise when turning. As the CV joints accumulate mileage, they develop excessive play and looseness. This looseness allows the joint components to separate slightly when rotating. When the surfaces come back together, they make a distinct clicking noise.
This clicking is most noticeable when turning because the joints are articulating under load. A worn outer joint clicks when turning left. A worn inner joint clicks turning right. The clicking may be soft and intermittent at first but gets louder and occurs more frequently as the joint deteriorates.
Troubleshooting Tips:
- Jack up each front wheel separately and turn the steering fully left and right to isolate which side the clicking is coming from.
- Have an assistant turn the steering wheel while you listen near the wheel hub and at the inner joint.
- Bad outer joints click when turning left, and bad inner joints click when turning right
While a clicking CV joint may still function for some time, it indicates wear and looseness. The noise should be promptly inspected and addressed to avoid more extensive repairs later on.
Vibration at High Speeds
As the condition of the CV joints worsens, vibration may be felt through the drivetrain when driving at highway speeds. Excessive runout in the joint as it rotates causes wheel imbalance. This imbalance is usually most pronounced with worn outer CV joints.
The vibration gets progressively more pronounced as the joints wear. In severe cases, the vibration can become violent enough to shake the steering wheel and seats noticeably. Looseness in an outer joint can also lead to wheel shimmy when braking from high speeds.
Isolation Tips:
- The vibration will change or waver when accelerating versus cruising at a steady speed, pointing to the axle joints as the culprit.
- Listen for any clicking or popping sounds that accompany the vibration, which would indicate axle joint damage.
- Inspect the outer boots on each side for grease leakage indicating a torn boot or joint deterioration.
Addressing minor vibrations early can prevent the need to replace damaged components like wheel bearings that are put under excessive stress from the axle imbalance.
Grease Leaking From CV Boot
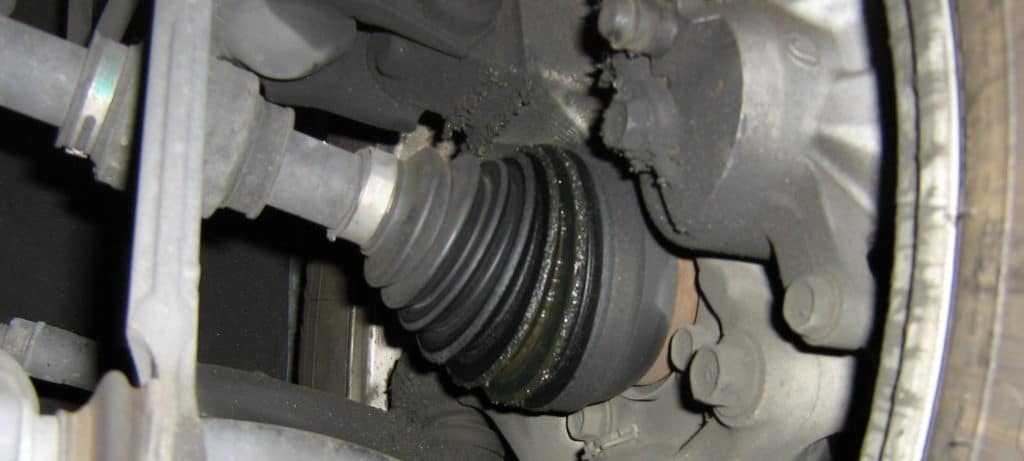
One clear sign that a CV joint needs replacement is grease leaking from a cracked or punctured rubber boot. The boots are the only barrier preventing contaminants from entering the joint and grease from leaking out.
When a boot is torn, the grease will quickly work its way out leaving the joint unlubricated. Dirt and water will hasten the wear on the now ungreased joint. Any grease observed coming from a wheel area indicates the boots should be thoroughly inspected and likely replaced.
Boot Replacement Tips:
- Depending on vehicle mileage, just replacing the torn boot may be an option if the joint itself feels tight with no play.
- However given the cost of labor to replace the boots, it may make sense to replace the entire CV axle shaft assembly at the same time. An experienced mechanic can advise if the joint needs replacement.
Don’t put off a leaking CV boot repair. The joints rely on constant grease lubrication and will deteriorate rapidly. Address any torn boots immediately before catastrophic joint failure occurs.
Steering Wheel Vibration When Turning
If an inner CV joint is in very poor condition, vibration may be felt through the steering wheel when turning. This indicates significant joint wear allowing the driveline to oscillate when transmitting torque to the wheel.
The vibration will increase in intensity when making a hard turn as the compromised joint is placed under greater strain. Any steering wheel vibration related to a bad CV joint needs prompt attention to avoid damaging other components.
Joint Testing:
- Use a pry bar to check for looseness or play in the joints by prying on the axle near the joints.
- Have an assistant turn the steering wheel while you check for any clunking or ill-defined rotational movement of the axle shaft.
- Inspect boots for tearing and joints for excessive gritty grease that would indicate wear debris.
Vibration at the steering wheel suggests the joint damage has progressed significantly already, so repairs should not be delayed.
Clunking Noise When Turning
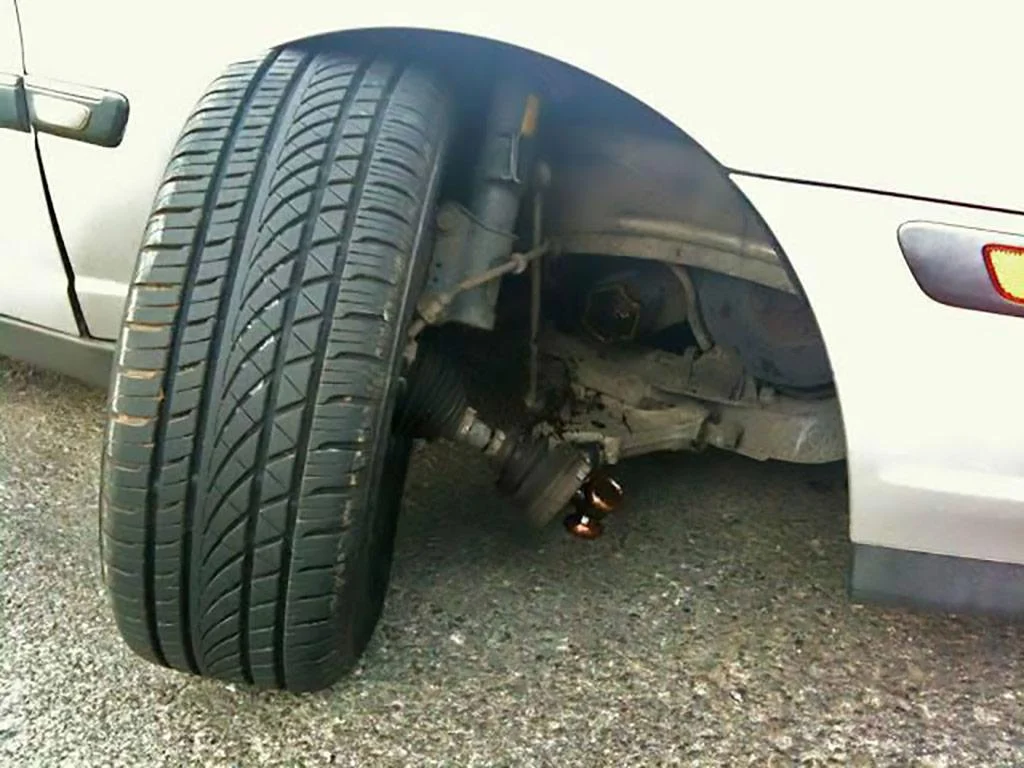
The final warning sound a failing CV joint will make is a clunking or knocking noise when turning. At this stage, the excessive joint looseness will allow the drive axle to literally flop around at an angle when transmitting torque.
The looseness causes the axle to violently move from side to side when cornering, creating a very loud clunk or knock. This indicates the joint is on the verge of catastrophic failure making it unsafe to drive.
Prevention Tips:
- Address minor symptoms like clicking early before CV joint damage progresses to the clunking stage.
- Inspect and grease boots regularly to maximize joint life.
- Consider CV joint replacements once a vehicle’s mileage is over 100,000 miles.
Don’t ignore a clunking CV joint and continue driving. At this point the integrity of the joint is severely compromised. Failure at speed could cause a loss of control.
When to Replace vs Repair CV Joints
Once symptoms of CV joint failure appear, you need to determine whether to repair or replace the joints. Here are some guidelines:
- If the boot is torn but the joint still feels tight, just replacing the boot may be sufficient. But given the labor cost involved, joint replacement may be a better value.
- If the joint has play and clicking but the vehicle has low mileage, just joint replacement without the axle may suffice.
- If the vehicle is over 100k miles or 10 years old, replacing the entire axle shaft assembly may be safest.
An experienced mechanic can assess joint tightness and advise if joint replacement or full axle replacement is most appropriate. Labor is the major cost, so make the most out of the work being done.
CV Joint Replacement Procedure
Replacing a CV axle shaft assembly takes between 1-3 hours for a DIY mechanic or professional shop to complete. The basic steps are:
- Loosen the wheel lug nuts and raise the vehicle. Support it securely on jack stands.
- Remove the wheel to access the CV axle components.
- On the outer CV joint, remove the brake caliper and rotor to access the axle nut and joint.
- Disconnect the outer joint from the wheel hub using a ball joint separator tool.
- At the inner CV joint, unbolt it from the transmission and disengage it from the splines.
- Install the new CV axle shaft assembly in place and connect the inner and outer joints.
- Reinstall the brake components, wheel, and lug nuts. Lower the vehicle.
- Have the alignment checked to avoid uneven tire wear from any suspension shifting during the work.
CV joint and axle replacement costs vary based on vehicle, part prices, and local labor rates. Expect to pay $150-350 or more for axle replacement.
Conclusion
Catching and addressing CV joint issues promptly preserves the health of your drivetrain and prevents damage to other components from excessive wear and vibration.
By recognizing common symptoms like clicking on turns, vibration at speed, and grease leaks you can diagnose joint problems early and avoid breakdowns. CV joints gradually deteriorate with age and mileage, so higher mileage vehicles over 10 years old are smart to have preventative joint replacements.
Reviewing the signs of failing CV joints and following the axle replacement procedures outlined here will help you maximize the lifespan of your vehicle’s driveline. Identifying issues early provides the chance to debate repairing versus replacing components before catastrophic failures occur.