Table of Contents
How to Jump Start Your Car Safely: Complete Technical Guide with Electrical Theory and Emergency Procedures
Introduction: Understanding How To Jump Start Your Car Safely
Jump starting a vehicle involves transferring electrical current from a charged battery to a depleted one, requiring careful attention to electrical principles, safety protocols, and proper procedures. While seemingly simple, this process involves potentially dangerous voltages and currents—a typical car battery can deliver over 600 amps of current, enough to weld metal or cause severe burns. Understanding the electrical theory, recognizing dangerous conditions, and following proper procedures can mean the difference between a successful jump start and catastrophic failure.
This comprehensive guide provides detailed technical information, safety protocols based on automotive industry standards, and troubleshooting procedures for various scenarios. We’ll examine the electrical principles involved, analyze common failure modes, and provide specific guidance for different vehicle types and conditions.
Electrical Theory and Battery Fundamentals
Understanding Battery Chemistry and Voltage
Lead-Acid Battery Operation
Chemical Reaction During Discharge:
Negative plate (anode): Pb + SO₄²⁻ → PbSO₄ + 2e⁻
Positive plate (cathode): PbO₂ + 4H⁺ + SO₄²⁻ + 2e⁻ → PbSO₄ + 2H₂O
Overall: Pb + PbO₂ + 2H₂SO₄ → 2PbSO₄ + 2H₂O
Voltage States:
- Fully charged: 12.6-12.8V (2.1V per cell × 6 cells)
- 75% charged: 12.4V
- 50% charged: 12.2V
- 25% charged: 12.0V
- Discharged: <11.9V
- During charging: 13.5-14.5V
- During starting: Can drop to 9-10V momentarily
Current Requirements and Cable Specifications
Starting Current Demands
Typical Cranking Requirements:
| Engine Size | Cold Cranking Amps (CCA) | Peak Current Draw | Duration |
|---|---|---|---|
| 1.0-2.0L 4-cyl | 400-550 CCA | 150-250A | 1-3 seconds |
| 2.5-3.5L V6 | 550-700 CCA | 200-350A | 1-3 seconds |
| 4.0-5.0L V8 | 650-850 CCA | 300-450A | 1-3 seconds |
| 6.0L+ V8 | 750-1000 CCA | 400-600A | 1-3 seconds |
| Diesel | 800-1200 CCA | 500-800A | 2-5 seconds |
Jumper Cable Specifications
AWG Wire Gauge Current Capacity:
| Gauge (AWG) | Wire Diameter | Max Safe Current | Voltage Drop (12ft @ 200A) | Use Case |
|---|---|---|---|---|
| 10 AWG | 2.6mm | 55A continuous | 2.4V | Emergency only |
| 8 AWG | 3.3mm | 80A continuous | 1.5V | Small cars |
| 6 AWG | 4.1mm | 120A continuous | 0.96V | Standard |
| 4 AWG | 5.2mm | 180A continuous | 0.60V | Recommended |
| 2 AWG | 6.5mm | 265A continuous | 0.38V | Heavy duty |
| 1/0 AWG | 8.3mm | 350A continuous | 0.24V | Commercial |
Critical Specifications:
- Clamp rating: Should match cable capacity
- Insulation: 600V minimum rating
- Temperature rating: -40°F to 140°F
- Clamp teeth: Copper or brass for conductivity
Comprehensive Safety Protocols
Hazard Assessment and Prevention
Battery Explosion Risk
Hydrogen Gas Generation:
- Production rate: 1 ft³ H₂ per 63 amp-hours overcharged
- Explosive concentration: 4-75% in air
- Ignition energy: 0.02 millijoules (1/10th static spark)
- Blast pressure: Up to 7,000 PSI at battery surface
Prevention Measures:
- Never create sparks near battery
- Ensure ventilation – 5 air changes per hour minimum
- No smoking within 10 feet
- Connect negative last, disconnect first
- Use remote ground point for final connection
Acid Exposure Hazards
Battery Acid (Sulfuric Acid) Properties:
- Concentration: 30-50% H₂SO₄
- pH: 0.5-1.0 (highly corrosive)
- Neutralization: Baking soda solution (1 tbsp/cup water)
- Eye contact: Can cause blindness in seconds
- Skin contact: Chemical burns within minutes
Personal Protective Equipment (PPE):
- Safety glasses: ANSI Z87.1 rated
- Gloves: Acid-resistant nitrile or neoprene
- Clothing: Long sleeves, closed shoes
- Face shield: For damaged batteries
- Emergency kit: Eye wash, baking soda
Pre-Jump Start Safety Inspection
Battery Condition Assessment
Do NOT Jump Start If:
| Condition | Visual Indicator | Risk | Action |
|---|---|---|---|
| Frozen battery | Bulging case | Explosion | Replace battery |
| Cracked case | Visible cracks | Acid leak | Replace battery |
| Low electrolyte | Plates exposed | Explosion | Add distilled water first |
| Severe corrosion | Blue/green buildup | Poor connection | Clean thoroughly first |
| Swollen/bulging | Deformed case | Internal damage | Replace battery |
| Leaking acid | Wet spots, smell | Chemical burns | Replace battery |
Electrical System Check
Preliminary Tests:
- Check alternator belt – Should deflect <1/2 inch
- Inspect terminals – Clean, tight connections
- Test dome light – Indicates some charge present
- Listen for clicking – Solenoid engagement
- Smell for burning – Indicates electrical damage
Detailed Jump Starting Procedures
Standard Vehicle-to-Vehicle Method
Step 1: Vehicle Positioning
Optimal Configuration:
- Distance: 18-24 inches apart
- Angle: Batteries facing each other
- Never touching: Risk of ground loop
- Level ground: Prevent rolling
- Ventilation: Open hoods fully
Electrical Isolation:
- Turn off all accessories
- Remove keys from ignition
- Disable auto-start systems
- Set parking brakes
- Manual transmission in neutral
- Automatic in Park
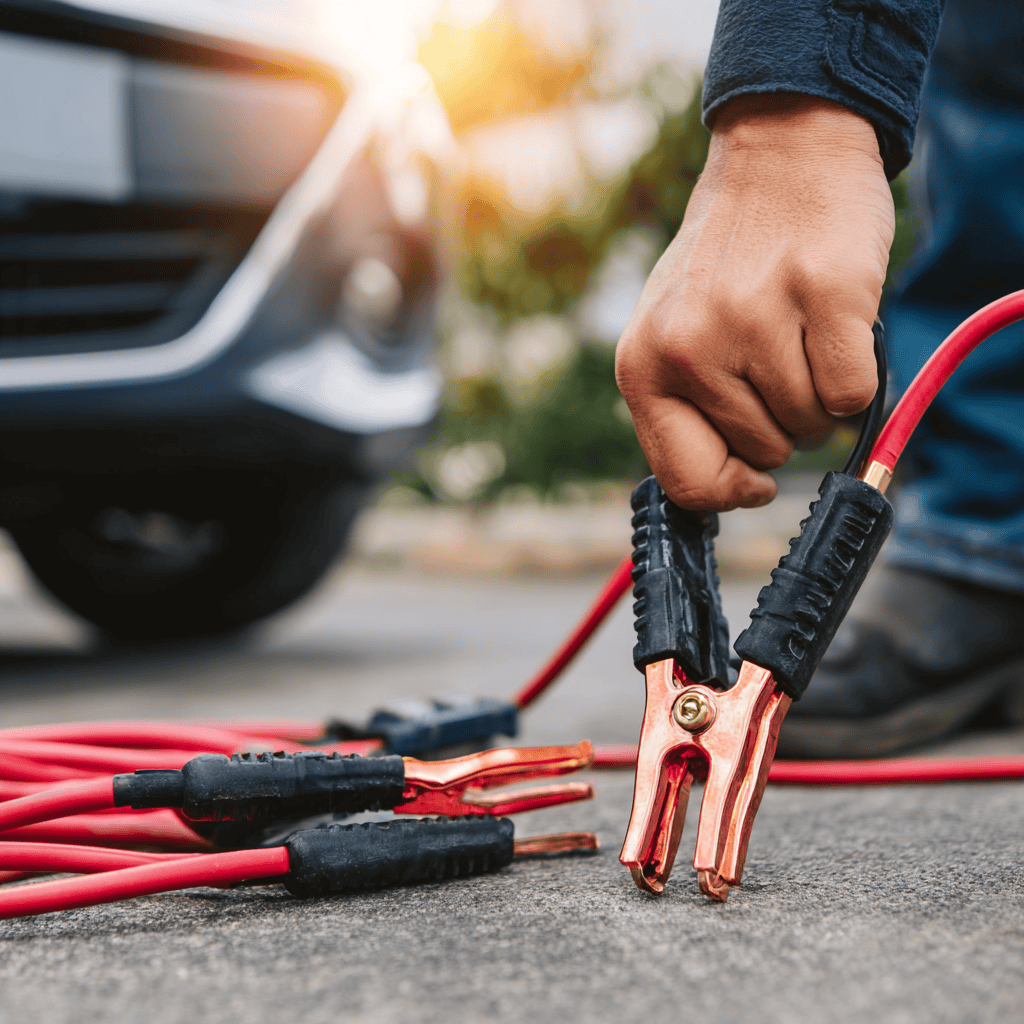
Step 2: Cable Connection Sequence
Critical Order (Dead Battery First):
1. RED to POSITIVE (+) on dead battery
2. RED to POSITIVE (+) on donor battery
3. BLACK to NEGATIVE (-) on donor battery
4. BLACK to GROUND on dead vehicle (NOT battery)
Proper Ground Points:
- Preferred: Engine block bolt
- Alternative: Strut tower bolt
- Acceptable: Alternator bracket
- Last resort: Frame member
- Distance: 12+ inches from battery
Step 3: Charging Phase
Donor Vehicle Operation:
Initial charge phase:
- Start donor vehicle
- Idle at 1,500-2,000 RPM
- Charge for 3-5 minutes minimum
- Monitor for unusual sounds/smells
- Check cable temperature (should be cool)
Voltage Transfer Calculation:
Charging current = (Donor voltage - Dead voltage) / Total resistance
Example: (13.5V - 11.0V) / 0.025Ω = 100A initial charge
Step 4: Starting Attempt
Proper Technique:
- First attempt: Crank for maximum 10 seconds
- If fails: Wait 2 minutes (cool starter)
- Second attempt: Rev donor to 2,000 RPM
- Third attempt: After 5 more minutes charging
- If still fails: Investigate other issues
Step 5: Disconnection Procedure
Reverse Order Removal:
1. BLACK from ground point (dead vehicle)
2. BLACK from donor battery negative
3. RED from donor battery positive
4. RED from revived battery positive
Post-Start Requirements:
- Run engine 20-30 minutes minimum
- Drive at varying speeds (charges faster)
- Avoid stopping engine for 1 hour
- Test battery/alternator within 24 hours
Using Portable Jump Starters
Lithium-Ion Jump Starter Specifications
Capacity Requirements by Vehicle:
| Vehicle Type | Minimum Capacity | Peak Current | Recommended Models |
|---|---|---|---|
| Compact Car | 400A peak | 200A cranking | 8,000 mAh |
| Sedan/SUV | 600A peak | 300A cranking | 10,000 mAh |
| Truck/Large SUV | 800A peak | 400A cranking | 15,000 mAh |
| Diesel | 1000A peak | 600A cranking | 20,000 mAh |
Safety Features Required:
- Reverse polarity protection: Prevents damage
- Spark-proof technology: Eliminates arc risk
- Over-current protection: Prevents damage
- Low voltage cutoff: Protects jump starter
- Temperature monitoring: Prevents overheating
Special Scenarios and Procedures
Hybrid and Electric Vehicle Considerations
Hybrid 12V Battery Jump Starting:
- Locate 12V battery (often in trunk)
- Never touch orange cables (high voltage)
- Follow standard procedure for 12V system
- Ready mode required before driving
- Professional service recommended
EV 12V System:
- Purpose: Powers accessories, not propulsion
- Location: Under hood or trunk
- Procedure: Standard jump start method
- Caution: Main battery is 400-800V DC
Diesel Engine Procedures
Additional Requirements:
- Glow plug cycle: Wait for indicator
- Higher amperage: Use 2 AWG minimum
- Longer cranking: Up to 15 seconds
- Dual batteries: May need both jumped
- Block heater: Use if available
Advanced Troubleshooting
Diagnostic Flow Chart
When Jump Starting Fails
Progressive Diagnostic Steps:
| Symptom | Possible Cause | Test Method | Solution |
|---|---|---|---|
| No response | Poor connection | Check voltage at terminals | Clean, retighten |
| Clicks only | Low amperage | Test cable voltage drop | Upgrade cables |
| Slow crank | Insufficient charge | Charge 10+ minutes | Extend charge time |
| Starts then dies | Alternator failure | Test charging voltage | Replace alternator |
| Won’t hold charge | Bad cell | Load test battery | Replace battery |
Voltage Drop Testing
Acceptable Voltage Drops:
During cranking (200A load):
- Each cable: <0.5V
- Each connection: <0.2V
- Total circuit: <1.5V
- Ground path: <0.3V
Testing Procedure:
- Connect voltmeter across connection
- Attempt to start engine
- Read voltage during cranking
- 0.5V indicates resistance issue
Common Problems and Solutions
Problem: Sparking at Connections
Causes and Prevention:
- Cause: Making final connection at battery
- Solution: Always connect to ground point
- Cause: Dirty terminals
- Solution: Clean with baking soda solution
- Cause: Loose connections
- Solution: Ensure firm clamp grip
Problem: Cables Getting Hot
Temperature Thresholds:
- Normal: Ambient to 100°F
- Concerning: 100-140°F
- Dangerous: >140°F
- Action: Disconnect immediately if hot
Causes:
- Undersized cables for current draw
- Poor connections increasing resistance
- Extended cranking periods
- Internal cable damage
Battery Maintenance and Prevention
Preventive Maintenance Schedule
Regular Inspection Points
Monthly Checks:
- Voltage test: Should read >12.6V
- Terminal inspection: Look for corrosion
- Case examination: Check for damage
- Hold-down verification: Must be secure
Quarterly Maintenance:
- Clean terminals: Baking soda solution
- Apply protectant: Terminal spray or petroleum jelly
- Load test: Verify CCA rating
- Electrolyte check: (If serviceable)
Battery Life Optimization
Factors Affecting Battery Lifespan
Temperature Impact:
Battery life vs temperature:
77°F (25°C): 100% expected life (4-6 years)
92°F (33°C): 75% life (3-4.5 years)
106°F (41°C): 50% life (2-3 years)
122°F (50°C): 25% life (1-1.5 years)
Charging Best Practices:
- Float charge: 13.2-13.8V continuous
- Bulk charge: 14.4-14.8V limited time
- Equalization: 15.5V (flooded only)
- Temperature compensation: -3mV/°C per cell
Emergency Alternatives and Last Resorts
Alternative Starting Methods
Push Starting (Manual Transmission Only)
Procedure:
- Turn ignition ON (not start)
- Depress clutch fully
- Shift to 2nd gear
- Reach 5-10 MPH
- Release clutch quickly
- Give gas immediately
Requirements:
- Battery must have >10V
- Fuel system must prime
- Not recommended for catalytic converter health
Battery Parallel Connection
Temporary Power Boost:
- Connect good battery in parallel
- Maintains vehicle computer memory
- Allows alternator testing
- Maximum 30 minutes connection
Cost Analysis and Equipment Investment
Equipment Cost-Benefit Analysis
| Equipment Type | Initial Cost | Lifespan | Uses/Year | Cost per Use |
|---|---|---|---|---|
| Basic Cables (8 AWG) | $20-30 | 5 years | 4 | $1.25 |
| Quality Cables (4 AWG) | $50-70 | 10 years | 4 | $1.56 |
| Portable Starter | $80-150 | 5 years | 6 | $3.33 |
| Professional Grade | $200-300 | 15 years | 10 | $1.67 |
Professional Service Comparison
Emergency Service Costs:
- Roadside assistance: $50-100 per call
- Tow to shop: $75-150 plus mileage
- Mobile mechanic: $100-200 per call
- New battery delivered: $150-300 installed
Conclusion: Mastery Through Understanding
Successful jump starting requires more than memorizing cable connections—it demands understanding electrical principles, recognizing hazards, and responding appropriately to various scenarios. The difference between a routine jump start and a dangerous situation often comes down to proper assessment, correct procedures, and appropriate safety precautions.
Critical Success Factors:
- Safety first: Always assess hazards before proceeding
- Proper equipment: Invest in quality cables or jump starter
- Correct procedure: Follow connection sequence exactly
- Patience: Allow adequate charging time
- Maintenance: Prevent future occurrences
Remember: Jump starting is a temporary solution. A battery requiring frequent jumps indicates underlying problems requiring professional diagnosis. Regular maintenance, proper charging, and timely replacement prevent most jump-starting situations.