Introduction
Your vehicle’s axles and CV joints are crucial components that allow the wheels to receive power from the drivetrain while turning smoothly. The axle shafts connect the transmission to the wheels via Constant Velocity (CV) joints. The CV joints allow the wheels to move up and down over bumps and around corners while transmitting rotational force. Over time, an axle assembly experiences wear from constantly moving suspension components and transmitting torque. Eventually, this wear manifests itself in certain symptoms that indicate there is damage in the axle that needs repair. Addressing minor axle issues promptly is key to avoiding more extensive repairs. In this article, we’ll cover the most common symptoms of a bad axel. Learning to recognize these warning signs allows you to proactively diagnose axle problems before they lead to breakdowns or compromised safety. We’ll also overview average costs and procedures for axle and CV joint repairs.
Axle and CV Joint Anatomy
Front-wheel drive vehicles use axle shafts to connect the transmission to the front wheels. The axle shafts contain CV joints at each end that allow the wheels to move up and down over uneven roads while continuing to transmit rotary power.
Here are the key components that make up a front-wheel-drive axle assembly:
Inner CV Joint
The inner CV joint connects the transmission to the axle shaft. It uses splines to lock it to the shaft so rotational motion is transferred. On the transmission side, it has a plunging in and out motion that allows the axle to move with suspension travel. Common inner joint types are tripod and ball joints.
Outer CV Joint
The outer CV joint connects the wheel hub and steering knuckle to the end of the axle shaft. This joint uses ball bearings or roller bearings to allow the wheel to turn when steering while transmitting torque to drive the wheel. A protective rubber boot seals grease inside the joint.
Axle Shaft
The axle shaft is a sturdy steel shaft that connects the inner and outer CV joints. High-quality axle shafts are made from alloy steel or carbon-fiber composite designs. The shaft length accounts for suspension travel.
Protective Boot
A rubber boot encloses each joint and attaches to the axle shaft with a metal clamp. The boot keeps lubricating grease in the joint and prevents contaminants like dirt and water from entering.
Maintaining the axle boots is key to a long-lasting axle assembly. If the boots tear, the joints will deteriorate rapidly.
Causes of Axle and CV Joint Damage
There are several ways an axle assembly and CV joints gradually sustain damage over time and mileage:
- The constant movement and articulation place stress on joint components leading to microscopic cracking and wear.
- Rubber boots eventually crack or tear due to exposure to heat, road debris, weather elements and age.
- Loss of grease due to a damaged boot accelerates wear inside the now unlubricated joint.
- Potholes, bottoming out and other severe impacts can damage the axle or tear the fragile boots.
Regular inspection of boots and replacing torn ones early maximizes the lifespan of your axles. But eventually, the stress and wear will necessitate axle shaft and CV joint replacement.
Clicking Noise When Turning
One of the first symptoms exhibited by a damaged axle is a clicking noise when turning. As the CV joints wear, they develop excessive freeplay and looseness. This allows the joint surfaces to momentarily separate when coming under load. When the surfaces snap back together, it creates an audible click.
This clicking is most noticeable when turning since the joints are articulating under torque. The sound will come from the side with the damaged joint – left turns for the outer joint, and right turns for the inner joint. It starts softly and gradually increases as the joint further deteriorates.
Addressing a clicking CV joint quickly can prevent the need to replace the entire axle assembly.
Isolating the Source of the Click
To determine which joint is clicking, have an assistant slowly turn the steering wheel fully to the left and right while you listen near each front wheel with the engine running.
- A clicking noise from the left wheel area on left turns indicates an outer CV joint issue.
- Clicks on right turns point to the inner joint on that side being worn.
Inspect the rubber boots on the noisy joint for any tears or deterioration that may be allowing contaminants in to accelerate wear.
Vibration at High Speed
As axle joint condition worsens, vibration may be felt when driving at high speeds. Excessive runout in a worn joint introduces driveline imbalance. This vibration intensifies as the joint wears and starts to come apart internally.
Typically vibration points to wear in an outer CV joint rather than the inner joint. The vibration comes and goes when accelerating versus cruising. Bad axle joints can also lead to wheel shimmy when braking at high speeds.
Catching and addressing minor vibrations early can avoid damage to other components like wheel bearings from the constant shaking.
Isolating the Source of Vibration
Since many issues can cause vehicle vibration, here are tips to determine it is coming from a bad axle joint:
- The vibration changes or feels more muted when coasting versus maintaining throttle, pointing to the axle.
- Listen for any clicking or popping noises that accompany the vibration and occur when turning.
- Inspect the outer CV joint boots for grease leakage indicating a torn boot or joint wear.
Addressing minor vibrations promptly can avoid the need to replace damaged components like wheel bearings down the road.
Grease Leaking from Boot
One clear sign that an axle’s CV joint needs replacement is grease leaking from a cracked or punctured rubber boot. The boots are the only barrier preventing contaminants from entering the joint and grease from escaping.
When a boot is torn or perforated, the grease will quickly work its way out leaving the joint unlubricated. Dirt and water will rapidly hasten the wear on the now-dry joint. Any grease observed coming from a wheel area indicates the boots should be thoroughly inspected and likely replaced.
Diagnosing a Damaged Boot
Carefully visually inspect the entire CV boot looking for any cracks or holes where grease may be escaping. Also look for areas where the boot may be rubbed from contacting suspension components, causing wear and tear.
Determining if the joint itself needs replacement depends on additional symptoms and mileage. If the joint still feels tight with no play, just replacing the torn boot may suffice. However given the cost of labor to replace the boots, it may make sense to replace the entire CV axle shaft assembly at the same time if the vehicle has high miles. An experienced mechanic can best advise if the joint needs replacement.
Clunking Noise When Turning
The final warning sound a severely damaged CV joint will make is a clunking or knocking noise when turning. At this stage, the extreme joint looseness will allow the drive axle to literally flop at an angle when transmitting torque.
The looseness causes the axle to violently move from side to side when cornering, creating a very loud clunk or knock. This indicates the joint is on the verge of catastrophic separation making it unsafe to continue driving.
Don’t Ignore a Clunking Joint
If you hear a severe clunking noise from a front wheel area when turning, have the vehicle towed to avoid further damage. At this point, the joint is barely intact and could let go at any moment. Failure of a CV joint at speed could potentially cause loss of control and a crash.
Catching and addressing earlier symptoms like clicking and vibration will prevent deterioration to the clunking stage.
Uneven Tire Wear
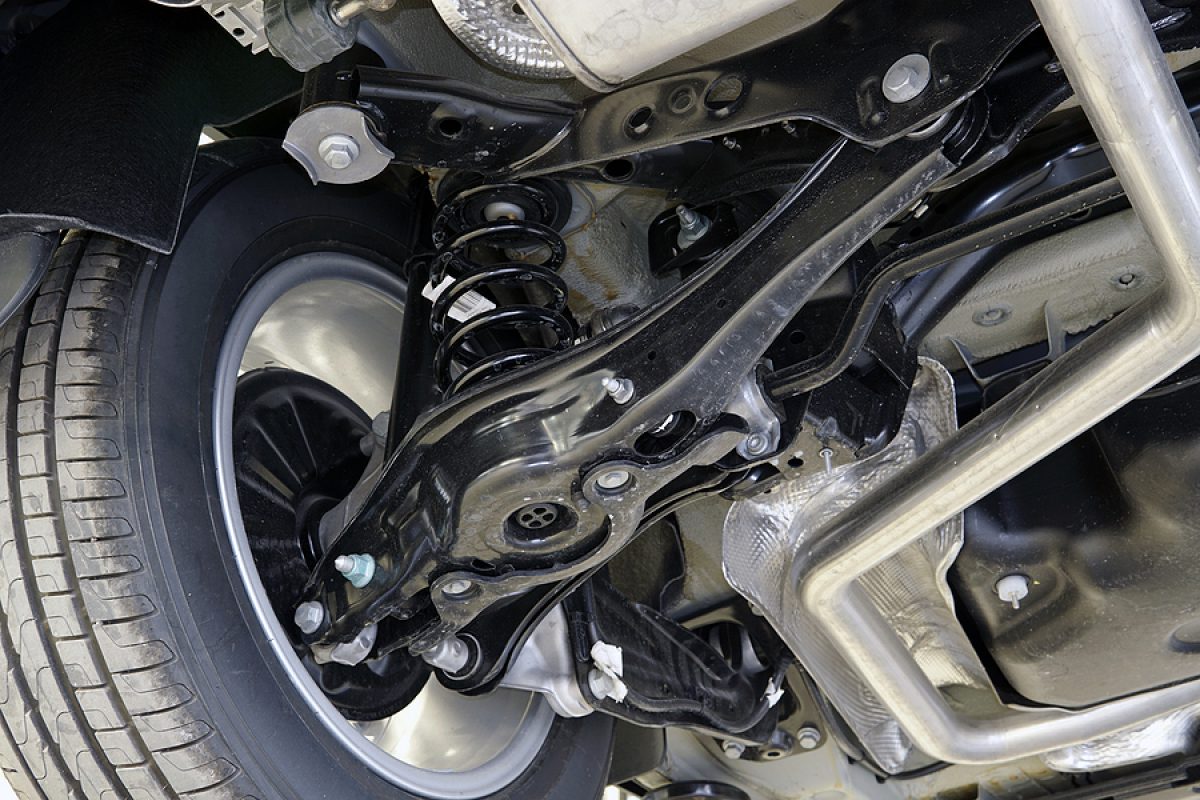
In addition to noise and vibration, axle damage can manifest itself in uneven front tire wear. When an axle is bent or a CV joint begins to fail, it can throw off the wheel alignment leading to abnormal tire wear.
Pay attention to inner vs outer tire edges when inspecting tread depth. Common wear patterns include:
- Excess inner edge wear indicates positive toe alignment (toe-in)
- Accelerated outer edge wear points to negative toe (toe-out)
- Diagonal wear across the tread can mean excessive camber
Wheel Alignment Impact
If you suspect axle damage based on noise or vibration symptoms, have your wheel alignment checked by a shop. They can confirm if a damaged axle is distorting the geometry leading to uneven tire wear. Any repairs to the axle or CV joints will require a four-wheel alignment afterward.
When to Repair vs Replace the Axle
Once you’ve diagnosed axle issues through noticeable symptoms, determining whether to repair or replace axle components depends on:
- The replacement part cost for boot vs joint vs full axle
- The hourly labor rate to perform the repair
- The vehicle’s overall mileage and service history
On higher mileage vehicles, replacing the full axle shaft assembly may be the wisest option for maximum longevity. But on lower mileage vehicles, just replacing a torn boot or single damaged joint may suffice if done promptly.
Inspecting the joint wear firsthand and discussing options with your mechanic will determine the most cost-effective repair.
Axle Shaft Replacement Procedure
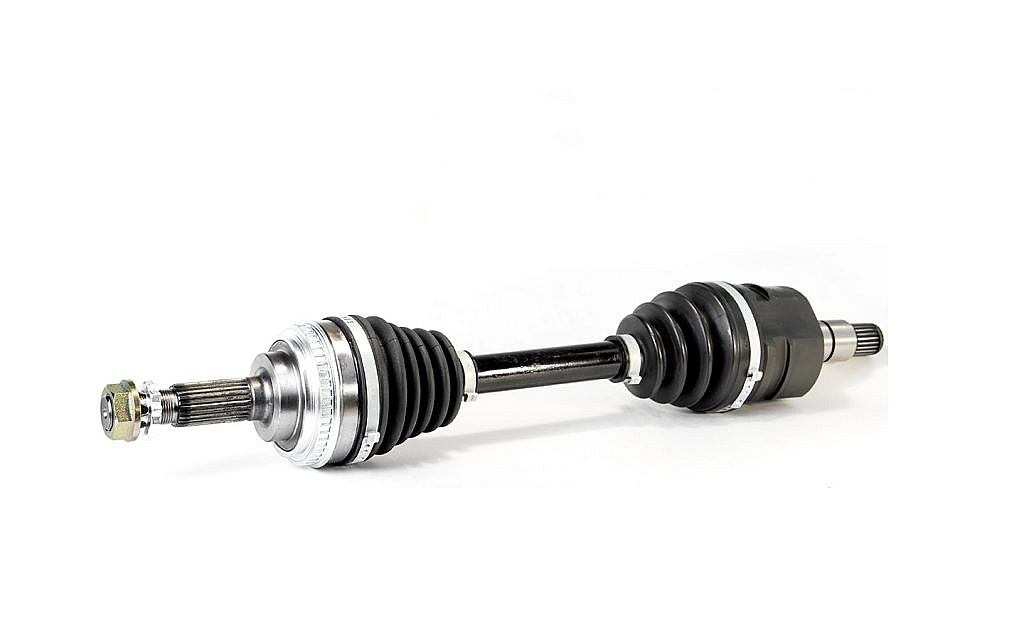
Replacing a full front axle shaft assembly typically takes 1-3 hours for a DIYer or shop to complete. The basic steps are:
- Safely support the vehicle on jack stands after loosening the front wheel lugs.
- Remove the wheel to access the CV axle components.
- Detach the outer CV joint from the wheel hub using a ball joint separator tool.
- At the inner joint, remove any transmission retainer clips and unbolt the joint.
- Carefully pull the axle shaft out from the transmission and maneuver it out.
- Install the new replacement axle shaft assembly in place.
- Reconnect the inner and outer joints securely.
- Reinstall the wheel and torque the lugs to spec.
- Have the wheel alignment checked to avoid any uneven tire wear.
Conclusion
Learning to listen and look for the common signs of axle failure like clicking noises, vibration, and grease leaks can prevent extensive repairs and keep you safe. Catching problems early while still repairable avoids breakdowns and protects related components.
Now you can confidently diagnose axle issues through noise, uneven tire wear, and visual inspections. Use this knowledge to maximize the longevity of your vehicle’s axle assemblies and CV joints through proper preventative maintenance and repairs when symptoms arise. Investing in quality parts and repairs pays dividends through improved drivability and safety.