Mastering Auto Battery Maintenance
Key Takeaways:
- Auto battery maintenance is essential for extending the life and performance of your car battery.
- You should regularly check the battery terminals, electrolyte level, charge, and hold-down.
- You should avoid exposing the battery to extreme temperatures, overcharging, deep discharging, and parasitic drains.
- You should replace the battery every 3 to 5 years, or sooner if it shows signs of failure.
- You should dispose of the old battery properly and recycle it if possible.
What is Auto Battery Maintenance?
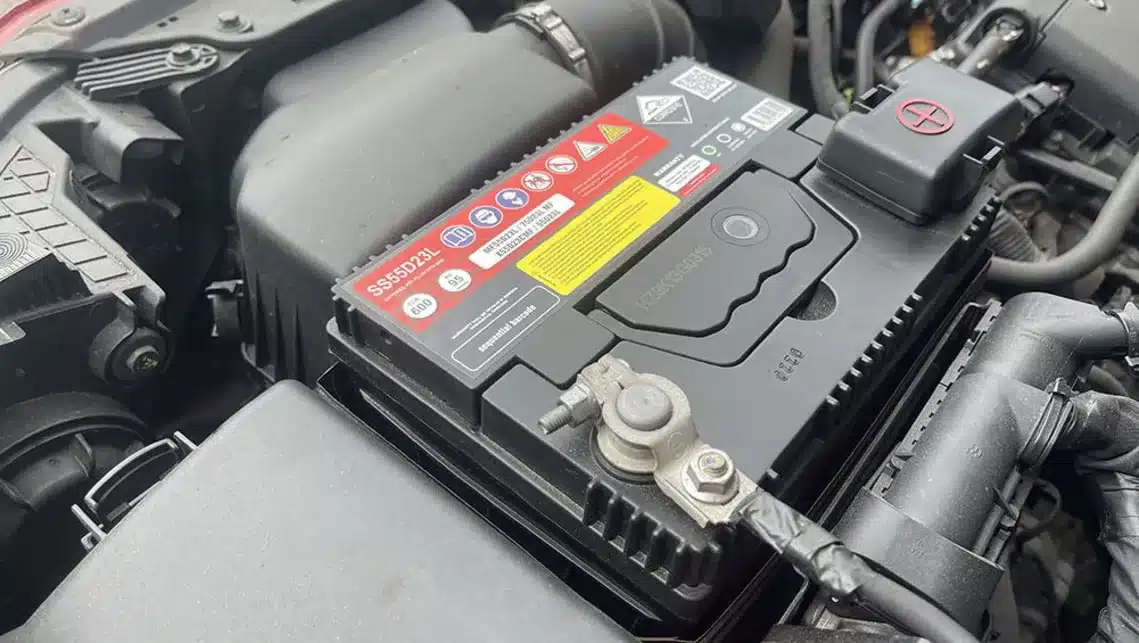
Auto battery maintenance is the process of taking care of your car battery to ensure that it works properly and lasts longer. A car battery is a device that stores electrical energy and provides power to the starter, ignition, lights, and other accessories of your car. Most modern car batteries are of the lead-acid type, which consist of a plastic case, lead plates, and an electrolyte solution of sulfuric acid and water1
Auto battery maintenance involves checking and cleaning the battery terminals, maintaining the electrolyte level, testing and charging the battery, securing the hold-down, and replacing the battery when necessary. By following these steps, you can prevent common battery problems such as corrosion, sulfation, low charge, and vibration damage. You can also improve the performance, reliability, and lifespan of your battery.
How to Maintain Your Car Battery

Here are some tips on how to perform auto battery maintenance and keep your battery in good condition:
Clean the Battery Terminals
The battery terminals are the metal connectors that attach the battery cables to the battery posts. Over time, the terminals can get dirty and corroded, which can reduce the electrical contact and cause poor starting, dim lights, and other issues. To clean the battery terminals, you will need the following tools and materials:
- A wrench or a socket to loosen the battery cables
- A wire brush or a terminal cleaner tool to scrub the terminals and posts
- A solution of baking soda and water to neutralize the acid and remove the corrosion
- A rag or a paper towel to wipe the terminals and posts dry
- A terminal spray or a grease to coat the terminals and posts and prevent future corrosion
To clean the battery terminals, follow these steps:
- Turn off the engine and remove the key from the ignition.
- Identify the positive (+) and negative (-) terminals and cables. The positive terminal is usually marked with a red cap or a plus sign, while the negative terminal is usually marked with a black cap or a minus sign.
- Disconnect the negative cable first by loosening the nut or clamp with a wrench or a socket and lifting the cable off the post. Then disconnect the positive cable in the same way. Be careful not to touch the metal parts of the cables or the tools to the battery posts or the car body, as this can cause sparks or short circuits.
- Dip a wire brush or a terminal cleaner tool into the baking soda and water solution and scrub the terminals and posts until they are shiny and free of corrosion. You can also use a toothbrush or a cotton swab for hard-to-reach areas.
- Rinse the terminals and posts with clean water and wipe them dry with a rag or a paper towel.
- Apply a terminal spray or a grease to the terminals and posts to protect them from corrosion and moisture.
- Reconnect the positive cable first by placing it over the post and tightening the nut or clamp with a wrench or a socket. Then reconnect the negative cable in the same way. Make sure the cables are firmly attached and do not wiggle or move.
- Start the engine and check the battery voltage and the dashboard lights. If everything is normal, you have successfully cleaned the battery terminals.
You should clean the battery terminals at least once a year, or more often if you notice signs of corrosion or dirt. You can also use a battery terminal protector, which is a plastic or rubber cover that fits over the terminals and posts and prevents corrosion and dirt from accumulating2
Maintain the Electrolyte Level

The electrolyte level is the amount of liquid inside the battery that covers the lead plates. The electrolyte level is important for the chemical reaction that generates electricity in the battery. If the electrolyte level is too low, the battery can lose its charge, overheat, or get damaged. If the electrolyte level is too high, the battery can overflow, leak, or cause corrosion.
To maintain the electrolyte level, you will need the following tools and materials:
- A pair of gloves and safety glasses to protect your hands and eyes from the acid
- A flashlight to see inside the battery
- A flat-head screwdriver to pry open the battery caps
- Distilled water to fill the battery cells
- A funnel to pour the water into the cells
- A hydrometer to measure the specific gravity of the electrolyte
To maintain the electrolyte level, follow these steps:
- Turn off the engine and remove the key from the ignition.
- Put on the gloves and safety glasses and locate the battery in your car. The battery is usually in the engine compartment, but it can also be in the trunk or under the seat in some cars.
- Remove the battery cover if there is one and identify the battery caps. The battery caps are the round or rectangular plugs on the top of the battery that seal the battery cells. Most batteries have six caps, one for each cell, but some batteries have only one or two caps that cover all the cells.
- Pry open the battery caps with a flat-head screwdriver and set them aside. Be careful not to spill or splash the electrolyte, as it is corrosive and can burn your skin or damage your car.
- Use a flashlight to look inside the battery cells and check the electrolyte level. The electrolyte level should be above the lead plates, but below the fill line or the bottom of the vent tube. The fill line or the vent tube is a small hole or a tube inside the cell that indicates the maximum level of the electrolyte. If you cannot see the fill line or the vent tube, the electrolyte level should be about 1/4 inch or 6 mm below the top of the cell.
- If the electrolyte level is low, use a funnel to pour distilled water into the cell until it reaches the fill line or the vent tube. Do not use tap water, as it contains minerals and impurities that can damage the battery. Do not overfill the cell, as it can cause the electrolyte to overflow or leak. Repeat this step for each cell that needs water.
- If the electrolyte level is high, use a syringe or a turkey baster to suck out some of the electrolyte until it reaches the fill line or the vent tube. Dispose of the excess electrolyte properly and safely, as it is hazardous and cannot be poured down the drain or thrown in the trash.
- Replace the battery caps and press them firmly into place. Make sure they are tight and do not leak.
- Use a hydrometer to measure the specific gravity of the electrolyte in each cell. The specific gravity is a measure of the concentration and the state of charge of the electrolyte. A hydrometer is a device that has a bulb, a tube, and a scale. To use a hydrometer, follow these steps:
- Squeeze the bulb and insert the tube into a cell. Release the bulb and draw some of the electrolyte into the tube. Make sure the tube is full and there are no air bubbles in the electrolyte.
- Hold the hydrometer vertically and read the scale. The scale shows the specific gravity of the electrolyte in units of grams per milliliter (g/mL) or in percentages. The specific gravity of a fully charged battery should be between 1.265 and 1.299 g/mL or between 100 and 130 percent, depending on the temperature and the type of the battery. The specific gravity of a discharged battery should be below 1.200 g/mL or below 80 percent.
- Squeeze the bulb and return the electrolyte to the same cell. Do not mix the electrolyte from different cells, as it can affect the accuracy of the measurement. Repeat this step for each cell and record the readings.
- Compare the readings of the cells. The readings should be within 0.050 g/mL or 5 percent of each other. If the readings are different, it means that the battery is unevenly charged or has a bad cell. A bad cell is a cell that has a much lower or higher specific gravity than the others, or that does not change its specific gravity after charging or discharging. A bad cell can reduce the performance and the lifespan of the battery and should be replaced as soon as possible.
- Start the engine and check the battery voltage and the dashboard lights. If everything is normal, you have successfully maintained the electrolyte level.
You should check and maintain the electrolyte level at least once every six months, or more often if you drive in hot or cold weather, or if you notice signs of low charge or leakage. You should also check and maintain the electrolyte level before and after storing the battery for a long period of time3
Test and Charge the Battery
The battery charge is the amount of electricity stored in the battery that can be used to power the car. The battery charge is measured in volts and amps. A fully charged battery should have a voltage of 12.6 volts or more and an amperage of 600 amps or more, depending on the size and the type of the battery. A low or dead battery can cause the car to not start, run poorly, or have electrical problems.
To test and charge the battery, you will need the following tools and materials:
- A voltmeter or a multimeter to measure the battery voltage
- A battery charger to charge the battery
- A pair of jumper cables
To test and charge the battery, follow these steps:
- Turn off the engine and remove the key from the ignition.
- Locate the battery in your car and identify the positive (+) and negative (-) terminals and cables.
- Connect the voltmeter or the multimeter to the battery terminals. The red probe should go to the positive terminal and the black probe should go to the negative terminal. Be careful not to touch the metal parts of the probes or the tools to the battery posts or the car body, as this can cause sparks or short circuits.
- Set the voltmeter or the multimeter to the DC voltage mode and read the display. The display shows the battery voltage in volts. The battery voltage should be between 12.4 and 12.6 volts when the engine is off and between 13.7 and 14.7 volts when the engine is running. If the battery voltage is below 12.4 volts, the battery is low or dead and needs to be charged. If the battery voltage is above 14.7 volts, the battery is overcharged and needs to be checked by a professional.
- Disconnect the voltmeter or the multimeter from the battery terminals and set it aside.
- Connect the battery charger to the battery terminals. The red clamp should go to the positive terminal and the black clamp should go to the negative terminal. Be careful not to touch the metal parts of the clamps or the tools to the battery posts or the car body, as this can cause sparks or short circuits.
- Plug the battery charger into an electrical outlet and turn it on. Set the charging mode and the current according to the instructions of the battery charger and the battery. The charging mode can be slow, normal, or fast, depending on how quickly you want to charge the battery. The current can be 2, 10, or 20 amps, depending on the size and the type of the battery. A slow charging mode and a low current are recommended for a gentle and thorough charging of the battery.
- Monitor the charging process and the battery temperature. The battery charger should have a gauge or a light that indicates the state of charge of the battery. The battery should be fully charged when the gauge reaches 100 percent or the light turns green. The battery temperature should not exceed 125°F or 52°C, as this can damage the battery or cause it to explode. If the battery gets too hot, stop the charging and let it cool down before resuming.
- Turn off the battery charger and unplug it from the electrical outlet. Disconnect the battery charger from the battery terminals and set it aside.
- Start the engine and check the battery voltage and the dashboard lights. If everything is normal, you have successfully tested and charged the battery.
You should test and charge the battery at least once every three months, or more often if you drive in cold weather, or if you notice signs of low charge or poor performance. You should also test and charge the battery before and after storing the battery for a long period of time.
Secure the Hold-Down
The hold-down is the device that secures the battery to the battery tray and prevents it from moving or vibrating. The hold-down can be a metal clamp, a plastic strap, or a rubber wedge, depending on the type and the model of the battery and the car. The hold-down is important for the stability and the safety of the battery, as it can prevent the battery from shifting, shorting, or leaking.
To secure the hold-down, you will need the following tools and materials:
- A wrench or a socket to tighten or loosen the hold-down bolts or nuts
- A new hold-down or a replacement part if the old one is broken or missing
To secure the hold-down, follow these steps:
- Turn off the engine and remove the key from the ignition.
- Locate the battery in your car and identify the hold-down. The hold-down is usually on the side or the top of the battery and attaches to the battery tray or the car frame.
- Check the condition and the position of the hold-down. The hold-down should be intact, clean, and tight. The hold-down should not touch the battery terminals or the cables, as this can cause sparks or short circuits. The hold-down should not press too hard on the battery case, as this can cause cracks or leaks.
- If the hold-down is loose, tighten the hold-down bolts or nuts with a wrench or a socket until the hold-down is snug and secure. Do not overtighten the hold-down, as this can damage the battery or the hold-down.
- If the hold-down is broken or missing, replace it with a new one or a suitable part. You can buy a new hold-down or a replacement part from a car parts store or online. Make sure the new hold-down or the replacement part is compatible with your battery and your car. Follow the instructions of the manufacturer or the supplier to install the new hold-down or the replacement part.
- Start the engine and check the battery voltage and the dashboard lights. If everything is normal, you have successfully secured the hold-down.
You should check and secure the hold-down at least once a year, or more often if you drive on rough roads, or if you notice signs of movement or vibration of the battery. You should also check and secure the hold-down before and after storing the battery for a long period of time.
Replace the Battery
The battery replacement is the process of removing the old battery and installing a new one. The battery replacement is necessary when the old battery is worn out, damaged, or failed. A worn-out battery is a battery that has lost its capacity and performance due to aging, use, or abuse. A damaged battery is a battery that has physical defects such as cracks, leaks, or bulges. A failed battery is a battery that does not hold a charge, does not start the car, or causes electrical problems.
To replace the battery, you will need the following tools and materials:
- A wrench or a socket to loosen and tighten the battery cables and the hold-down bolts or nuts
- A new battery that matches the size, type, and specifications of the old one
- A battery carrier or a pair of gloves to handle the battery
- A rag or a paper towel to wipe the battery tray and the cables
- A terminal spray or grease to coat the terminals and posts
- A battery memory saver or a radio code to preserve the settings of the car’s computer and radio
To replace the battery, follow these steps:
- Turn off the engine and remove the key from the ignition.
- Locate the battery in your car and identify the positive (+) and negative (-) terminals and cables.
- Disconnect the negative cable first by loosening the nut or clamp with a wrench or a socket and lifting the cable off the post. Then disconnect the positive cable in the same way. Be careful not to touch the metal parts of the cables or the tools to the battery posts or the car body, as this can cause sparks or short circuits.
- Loosen the hold-down bolts or nuts with a wrench or a socket and remove the hold-down. Set it aside.
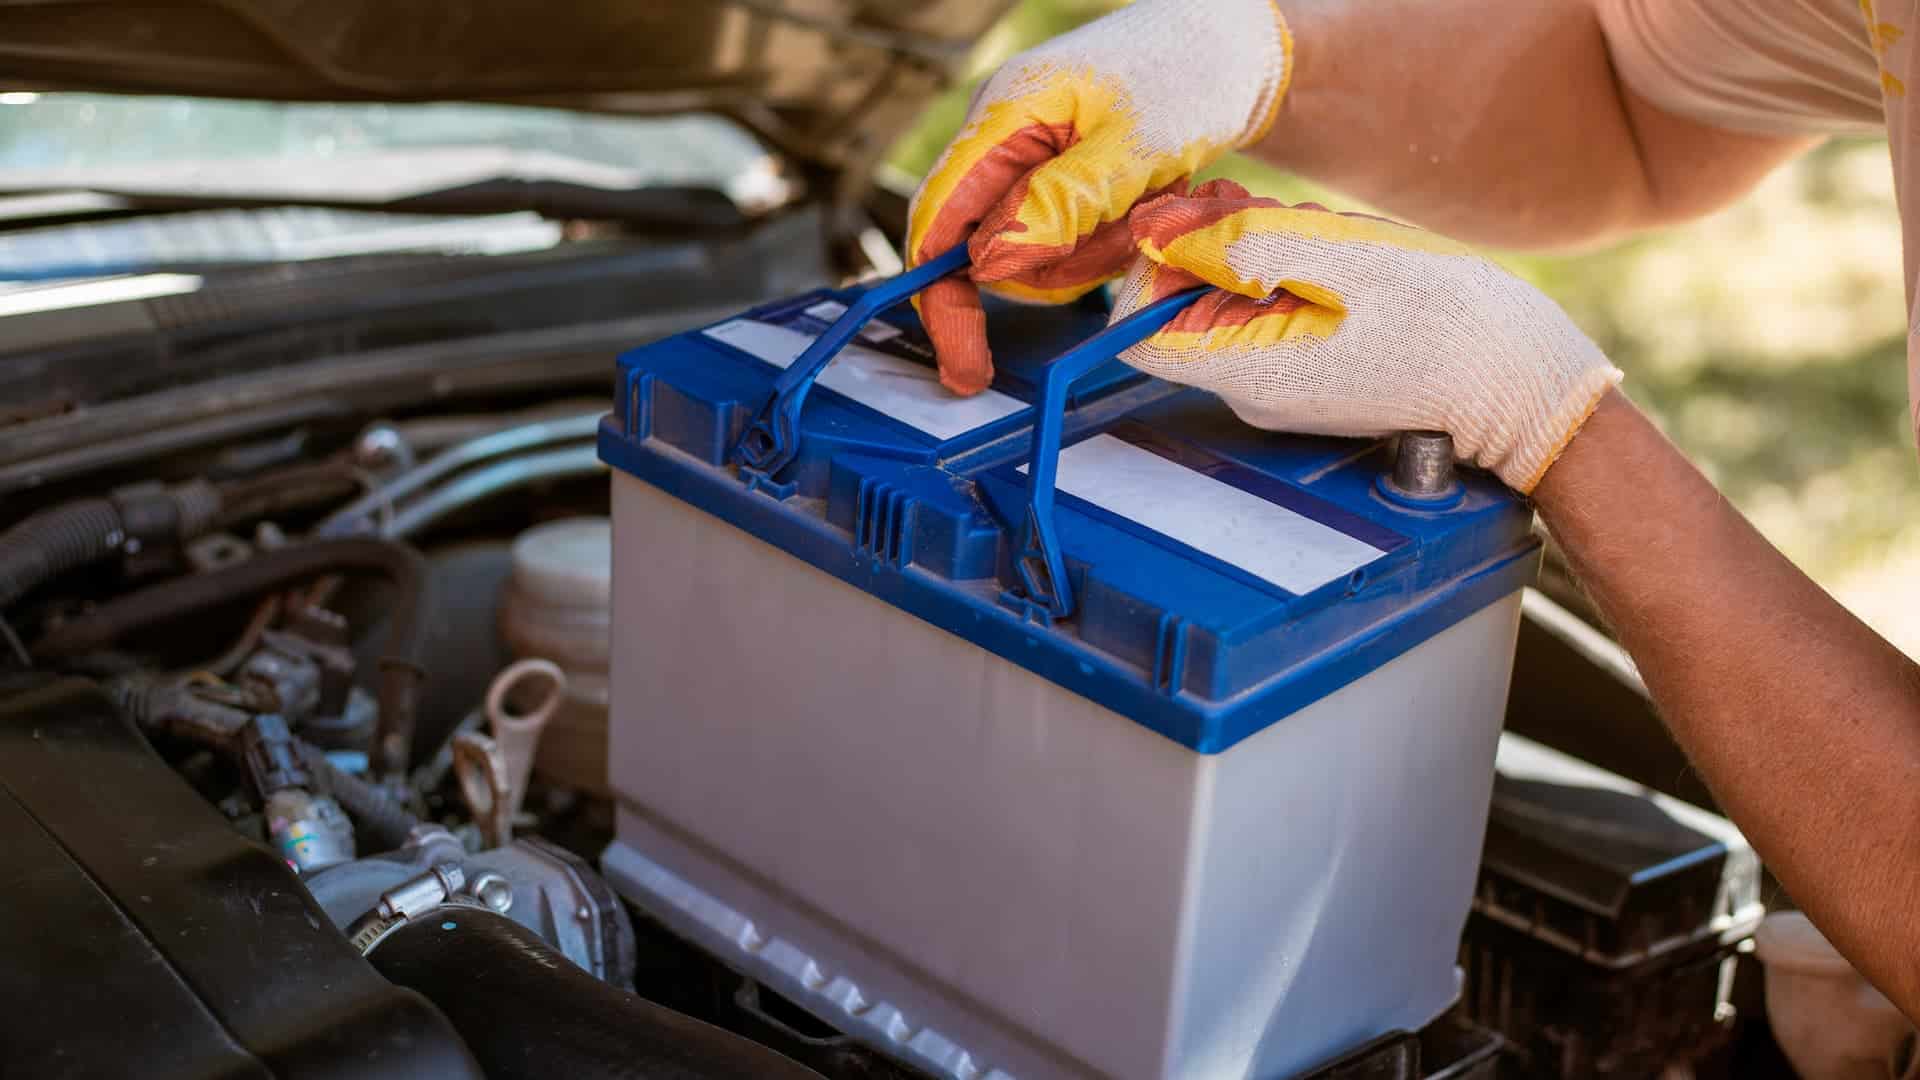
- Lift the old battery out of the battery tray and place it on a flat and stable surface. Use a battery carrier or a pair of gloves to handle the battery, as it is heavy and can leak acid. Do not tilt or shake the battery, as this can spill the electrolyte or damage the plates.
- Wipe the battery tray and the cables with a rag or a paper towel to remove any dirt or corrosion. If the battery tray or the cables are damaged, replace them with new ones or suitable parts.
- Place the new battery in the battery tray and align the terminals and the posts. Make sure the new battery matches the size, type, and specifications of the old one. You can check the label on the battery or the owner’s manual of your car for the correct information. You can also use a battery finder tool online to find the best battery for your car.
- Replace the hold-down and tighten the hold-down bolts or nuts with a wrench or a socket until the hold-down is snug and secure. Do not overtighten the hold-down, as this can damage the battery or the hold-down.
- Reconnect the positive cable first by placing it over the post and tightening the nut or clamp with a wrench or a socket. Then reconnect the negative cable in the same way. Make sure the cables are firmly attached and do not wiggle or move.
- Apply a terminal spray or grease to the terminals and posts to protect them from corrosion and moisture.
- Start the engine and check the battery voltage and the dashboard lights. If everything is normal, you have successfully replaced the battery.
You should replace the battery every 3 to 5 years, or sooner if it shows signs of wear, damage, or failure. You should also replace the battery before and after storing the battery for a long period of time.
Dispose of the Old Battery
The old battery disposal is the process of getting rid of the old battery in a safe and responsible way. The old battery disposal is important for the environment and health, as the old battery contains lead, acid, and other toxic substances that can pollute the soil, water, and air, and harm humans, animals, and plants.
To dispose of the old battery, you will need the following tools and materials:
- A battery carrier or a pair of gloves to handle the battery
- A plastic bag or a container to store the battery
- A recycling center or a car parts store that accepts old batteries
To dispose of the old battery, follow these steps:
- Turn off the engine and remove the key from the ignition.
- Locate the old battery and place it in a battery carrier or a pair of gloves. Do not touch the battery with your bare hands, as it can burn your skin or damage your clothes. Do not tilt or shake the battery, as this can spill the electrolyte or damage the plates.
- Put the old battery in a plastic bag or a container and seal it tightly. This will prevent the battery from leaking or spilling during the transportation. Do not store the old battery in your car, garage, or home, as it can pose a fire or explosion hazard.
- Take the old battery to a recycling center or a car parts store that accepts old batteries. You can find the nearest recycling center or car parts store online or by calling your local authorities. Some recycling centers or car parts stores may offer you a refund or a discount for your old battery, depending on the condition and the type of the battery. Do not throw the old battery in the trash or dump it in the environment, as this is illegal and harmful.
- Hand over the old battery to the recycling center or the car parts store and get a receipt or a confirmation. The recycling center or the car parts store will recycle the old battery and reuse the materials for making new batteries or other products. Recycling the old battery will reduce the waste and pollution and conserve natural resources and energy.
You should dispose of the old battery as soon as possible after replacing it with a new one. You should also dispose of the old battery properly and safely, as it is hazardous and cannot be treated as regular waste.
Conclusion
Auto battery maintenance is essential for extending the life and performance of your car battery. By following the tips and steps in this article, you can prevent common battery problems and improve the performance, reliability, and lifespan of your battery. You can also save money and time by avoiding unnecessary repairs or replacements. You can also protect the environment and health by recycling the old batteries and reducing the waste and pollution. Auto battery maintenance is not difficult or complicated, but it requires some knowledge, tools, and materials. By mastering auto battery maintenance, you can enjoy a smooth and safe driving experience.


[…] Battery and […]